Thank you To RISE’S AND not OR For MY DIY Backyard Vegetable Garden Post. As always all thoughts and opinions are 100% my own
PROGRESS has been made. The Chicago cold and rain won’t stop me. Okay, it actually did. I couldn’t get back out for four days but we finally had no rain (still cold) and I was able to complete my DIY backyard vegetable garden using RISE’s AND not OR approach. I shared exactly how RISE’s AND not OR approach revitalized my front yard and last week I posted how I plan to use their methods to create my first Vegetable Garden.
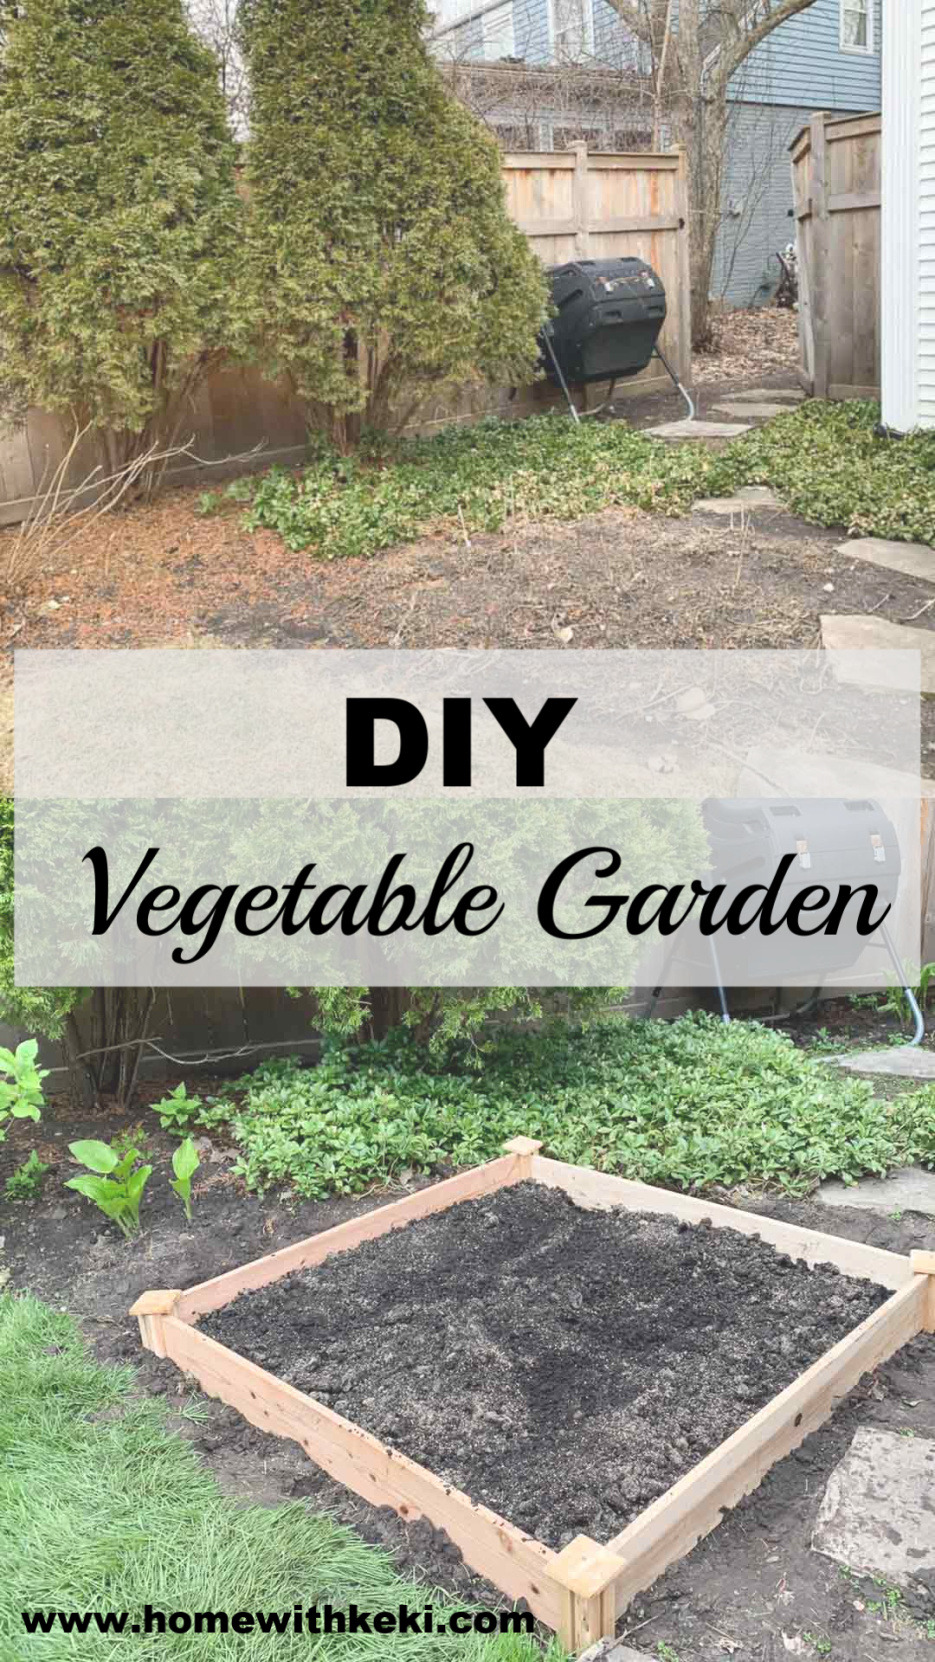
DIY Backyard Vegetable Garden
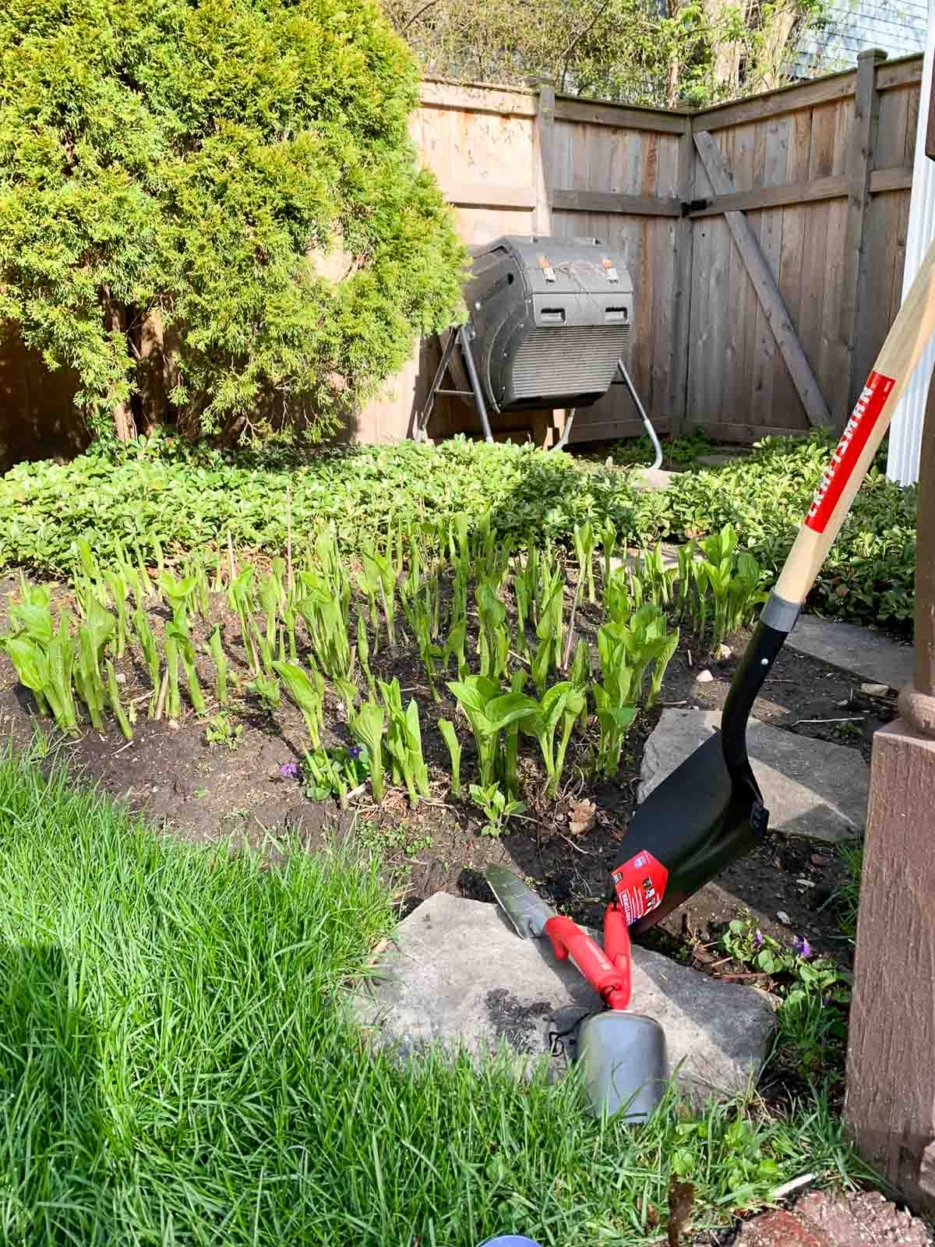
Last week I shared my plans but this past weekend I was finally able to move forward. First step was to make sure I had bug spray. With all the rain we have had I had to cover up. I actually keep bug spray in my garden box.
Then, it was time to move over 50 hostas. At first, I thought this would be a quick task but, I didn’t realize how many hosta sprouts I had. I was running out of space to transfer them that I ended up giving some to my neighbor.
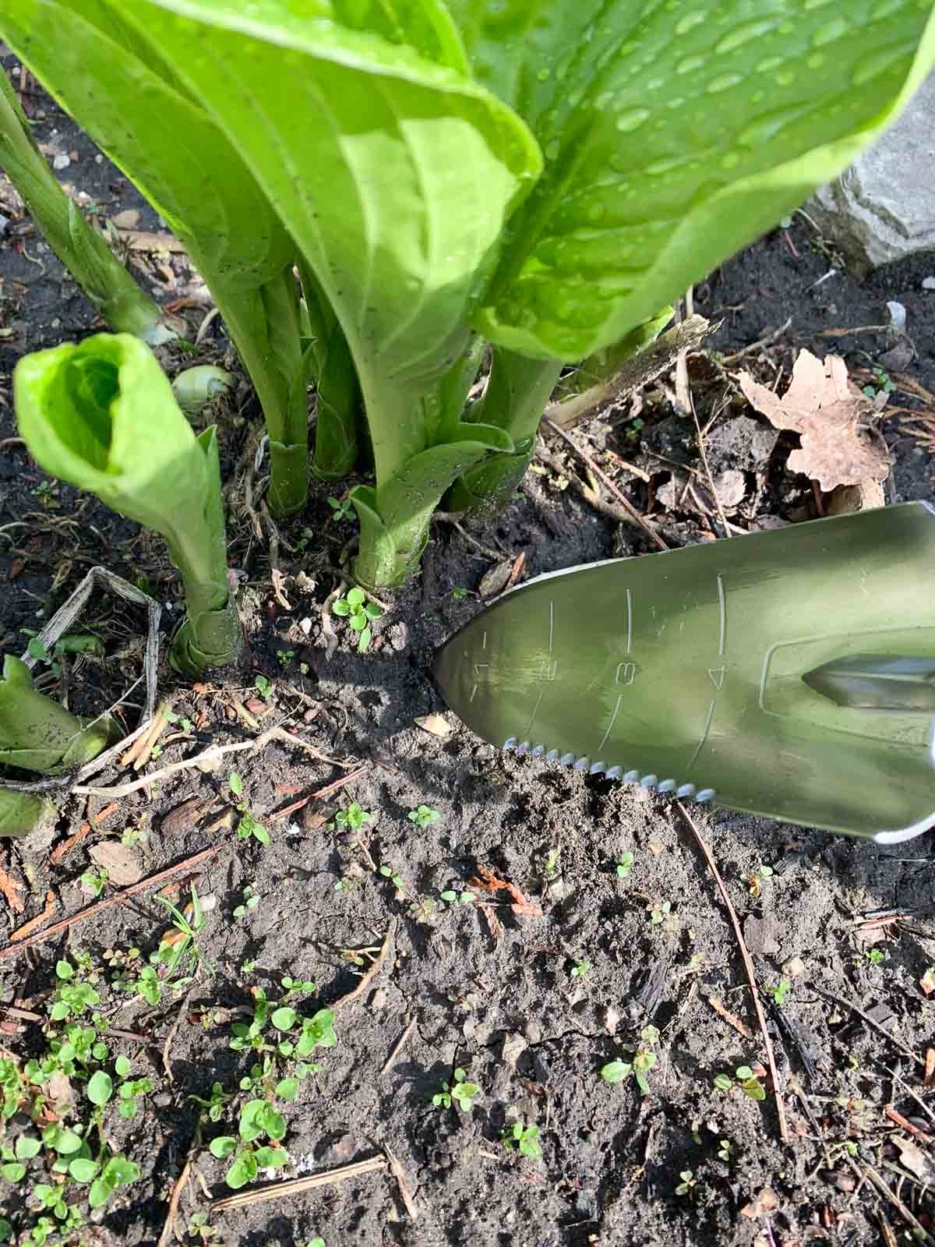
How To Remove Hostas
- Using a handheld trowel carefully remove hosta sprouts by digging 2-3 inches away from the sprout in a full circle
- See photo below
- Then, with a shovel, dig deeper into the circle you created and lift the hostas from under their roots.
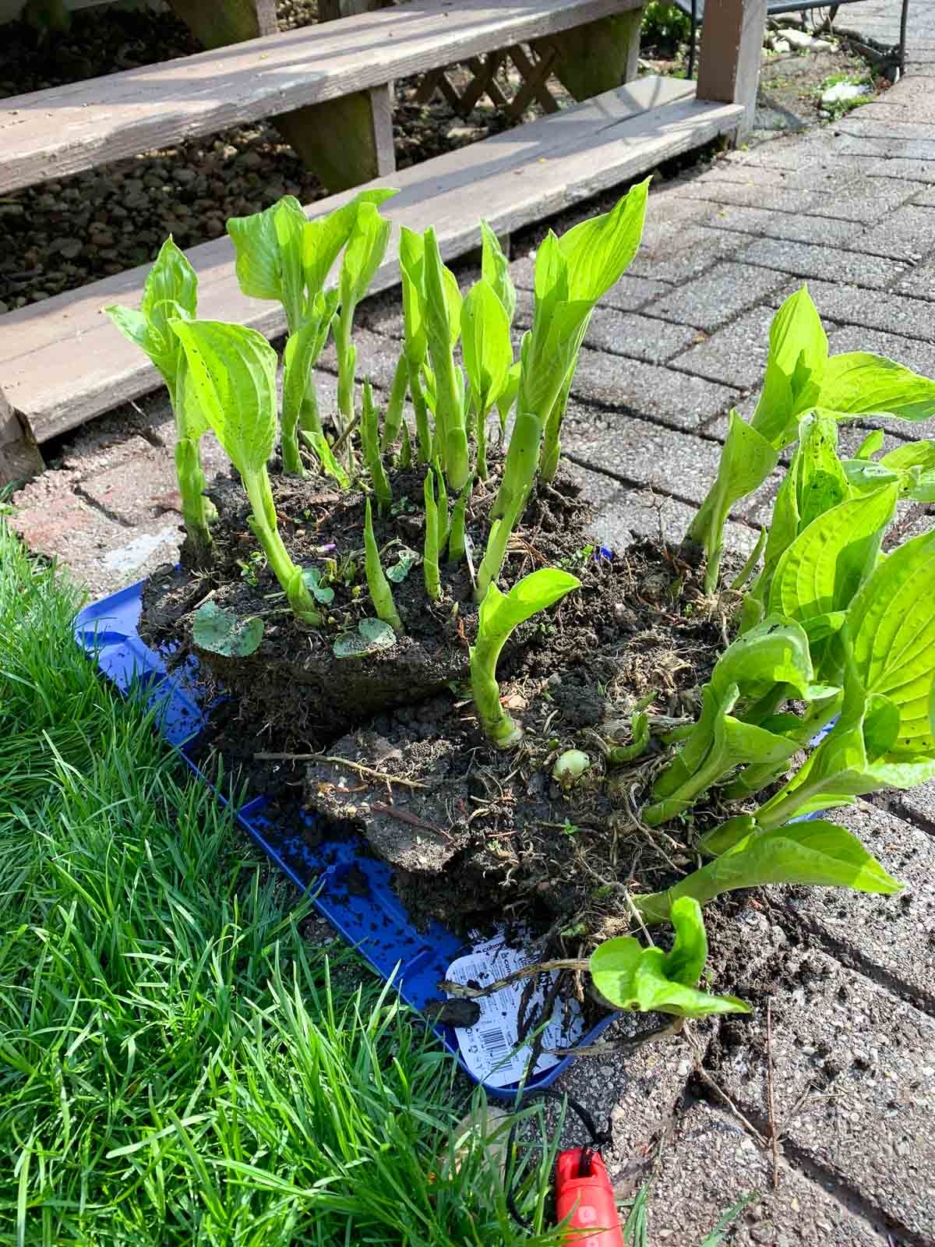
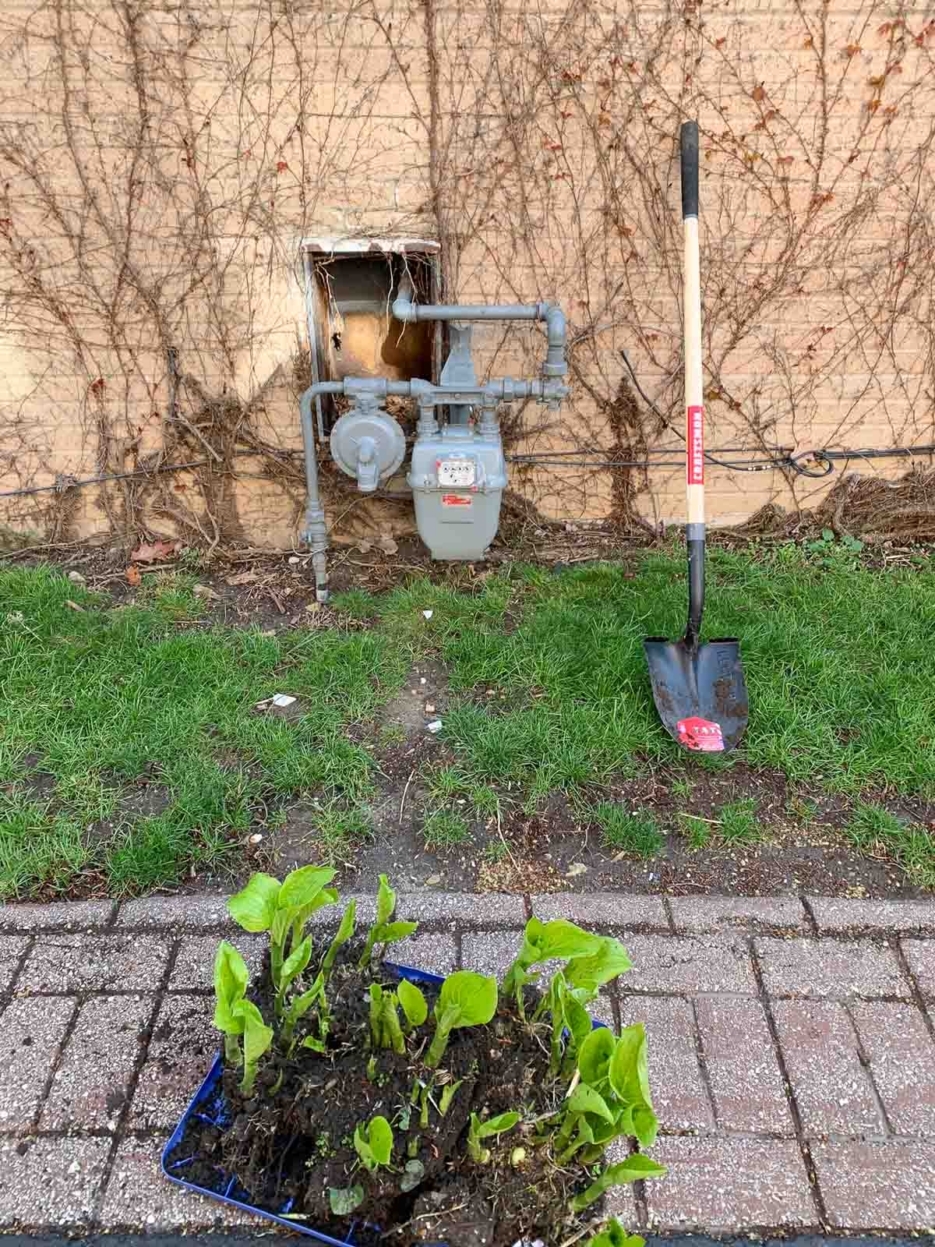
Transferring the hostas. I found a few areas I always wanted to cover. This is my neighbors home but it overlooks our driveway. I have always wanted to do something to hide their electric meter and the hostas were perfect.
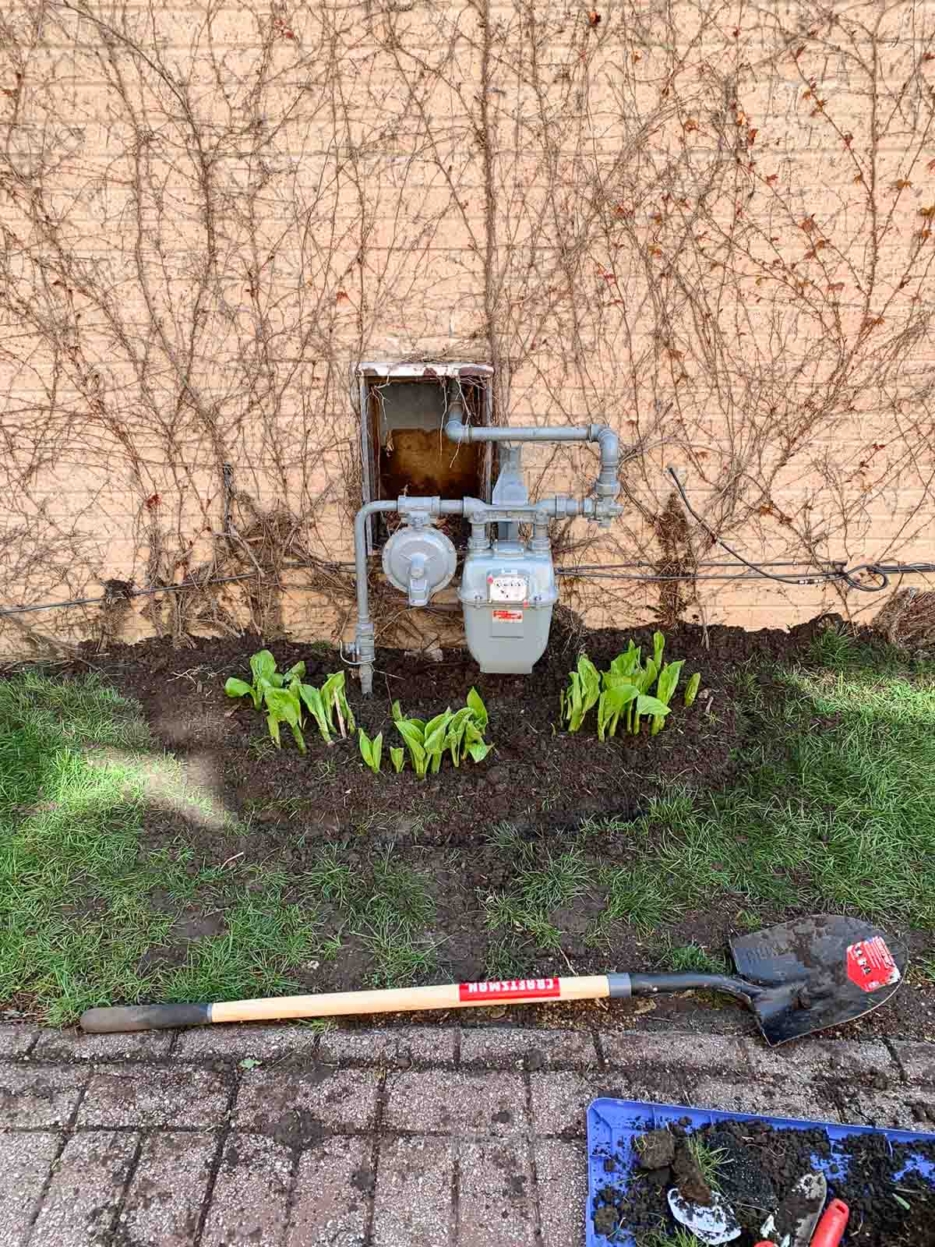
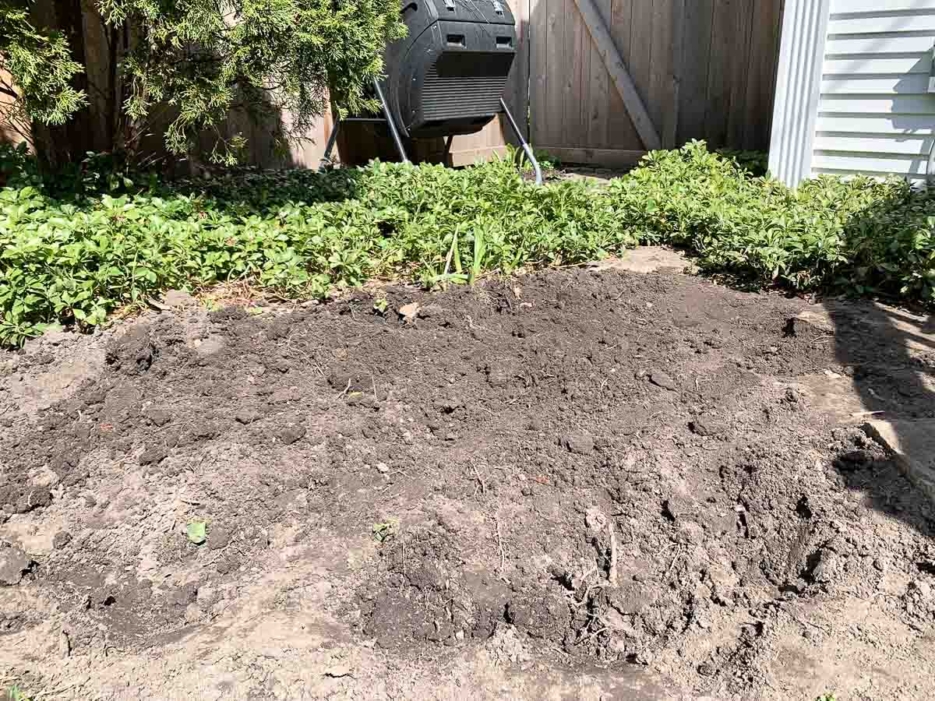
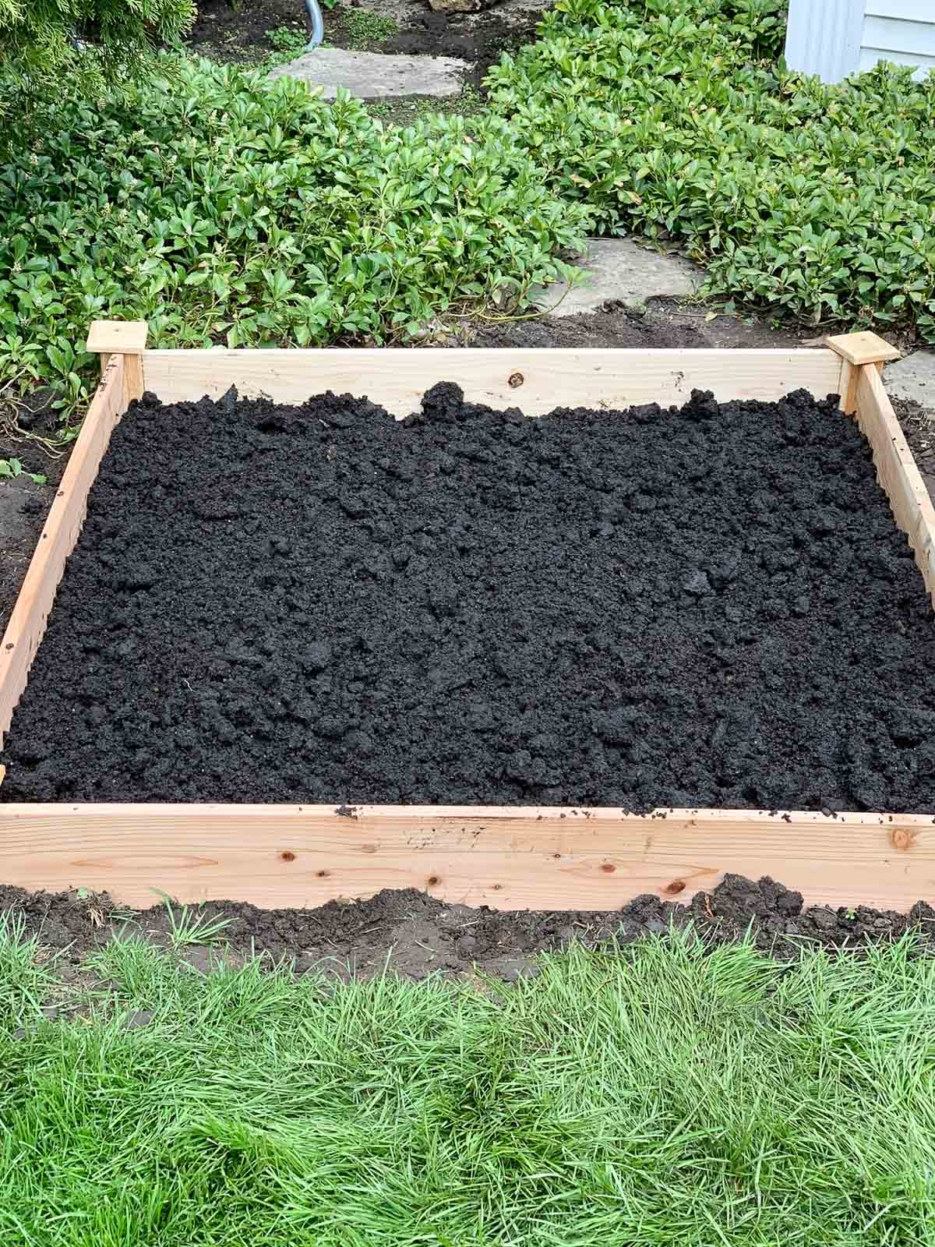
After a couple hours of some elbow grease I had a large enough area perfect for my DIY Vegetable Garden. A spot that gets enough sunlight and is not in the way of the kids playing.
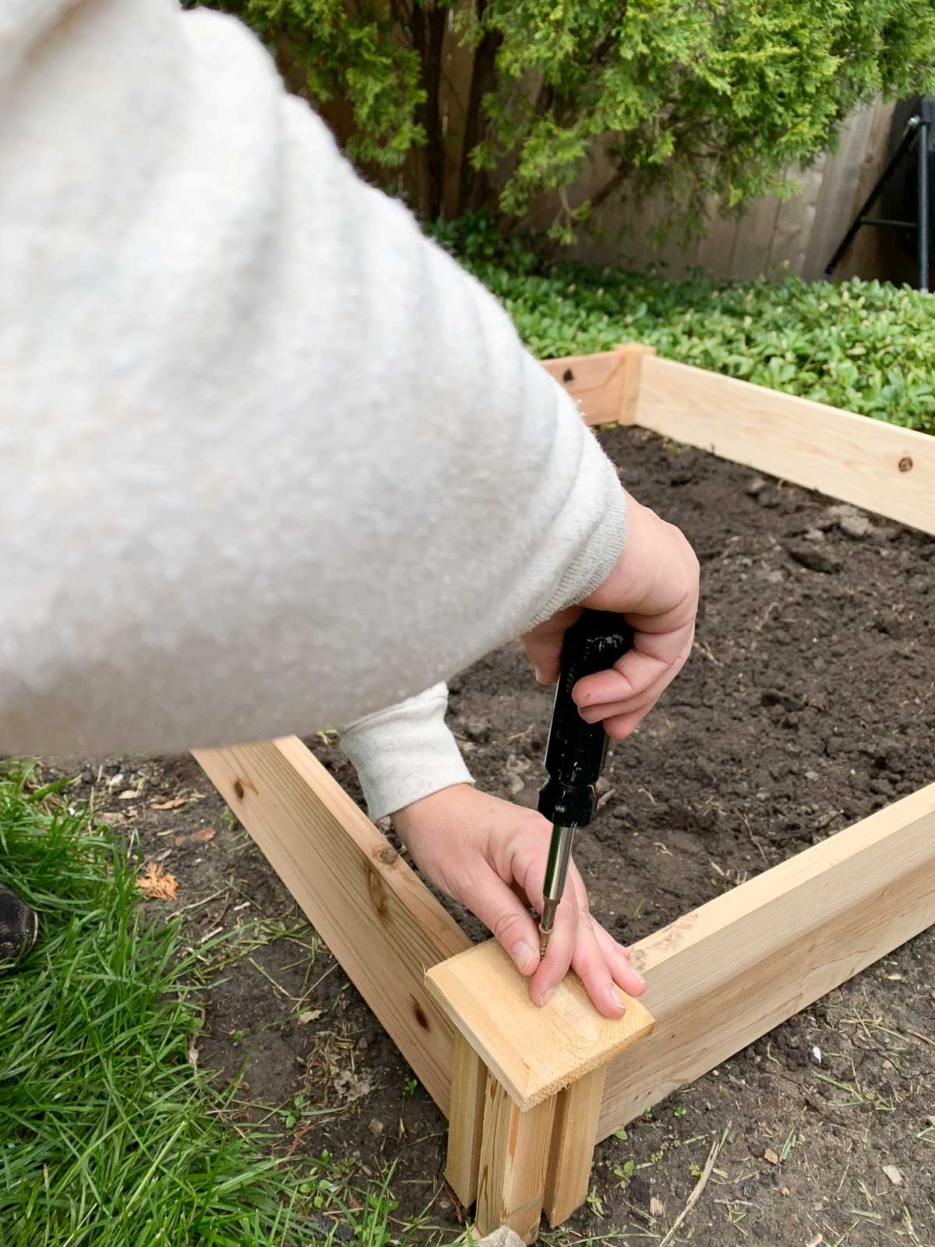
Within 30 minutes my DIY vegetable garden was done.
Here is all I needed:
- Precut raised garden bed made of natural cedar
- Natural WeedBlocker Fabric
- Garden Hardware Cloth
- Organic Potting Soil Mix
- All Purpose Garden Soil
- Compost
A Few Easy Steps:
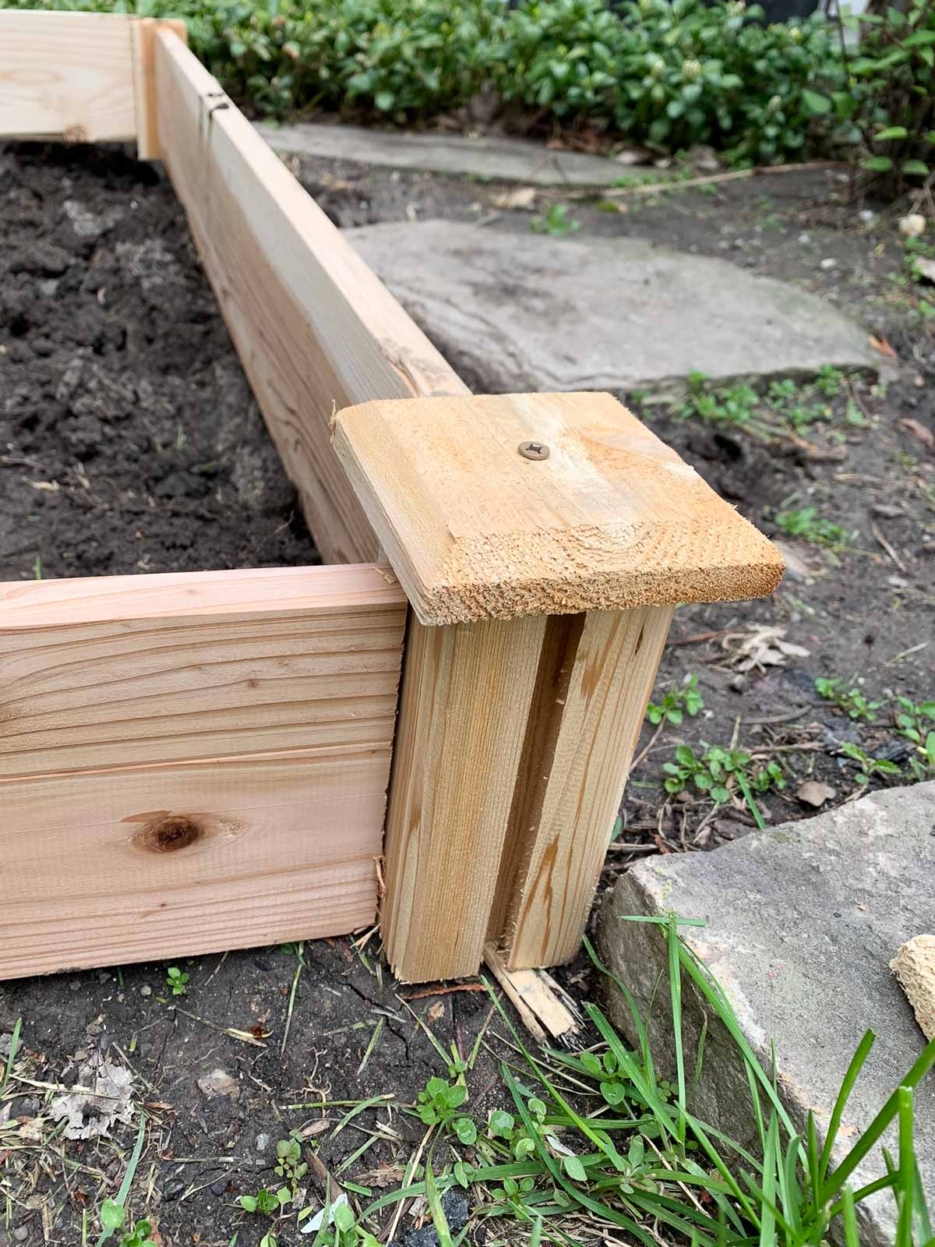
- Create your raised block by simply sliding in your cedar panels to the posts.
- Add the cedar post tops with weather proof screws
- Place in the desired area.
- Dig around the edges of the raised garden bed so you can place the entire bed of panels at least 1/2in. below dirt. This is to keep it from moving
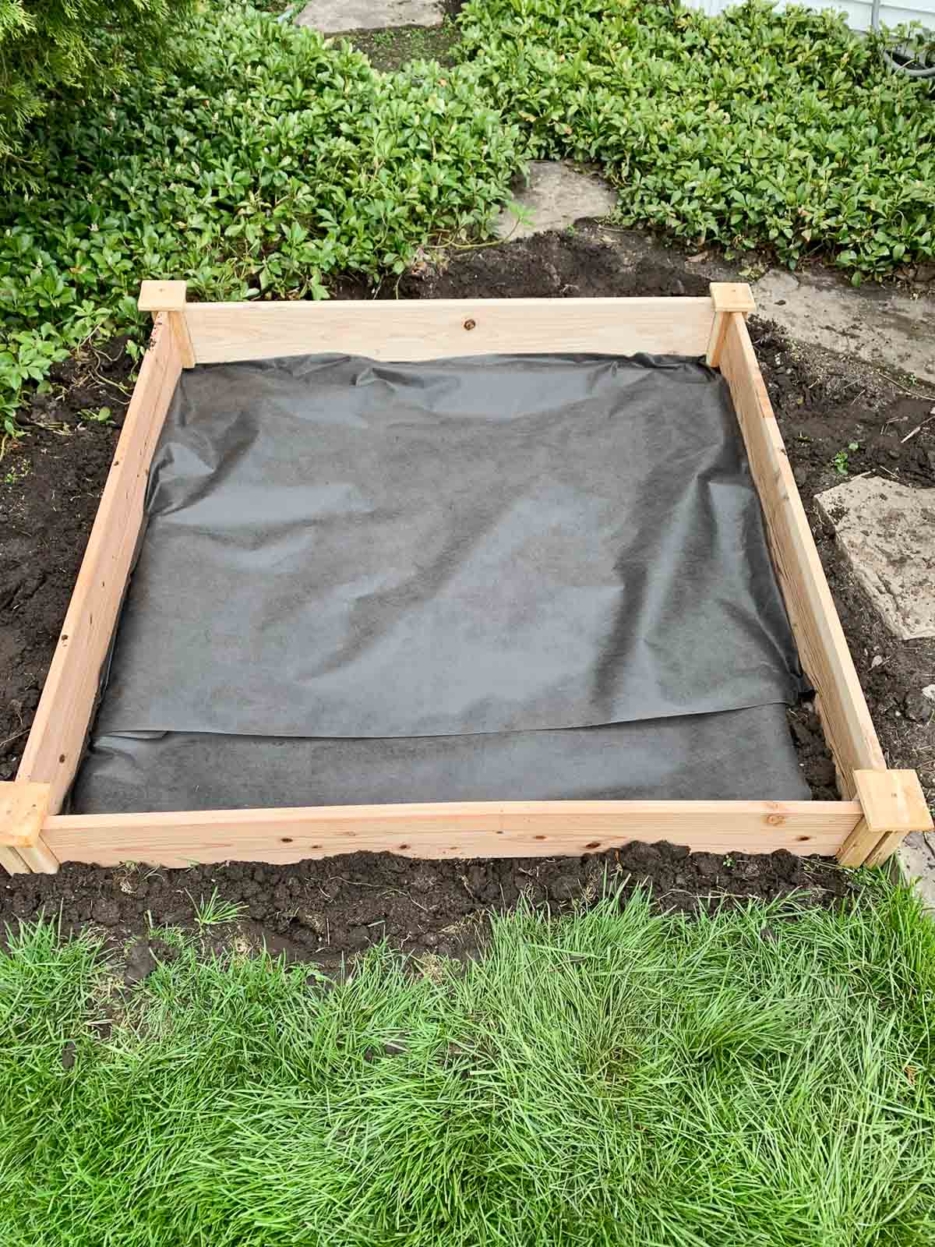
- Cut out and lay down the natural weed blocker fabric
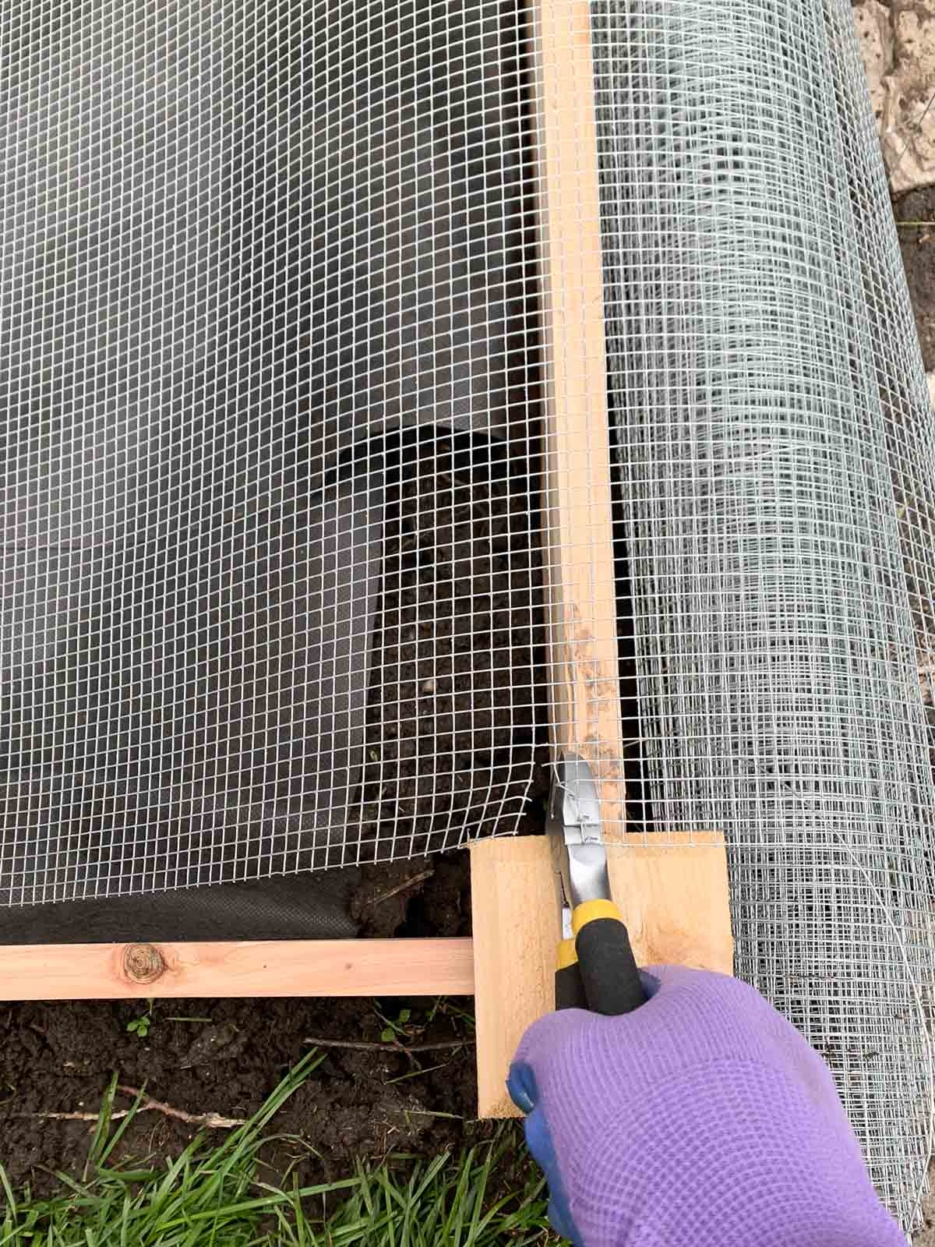
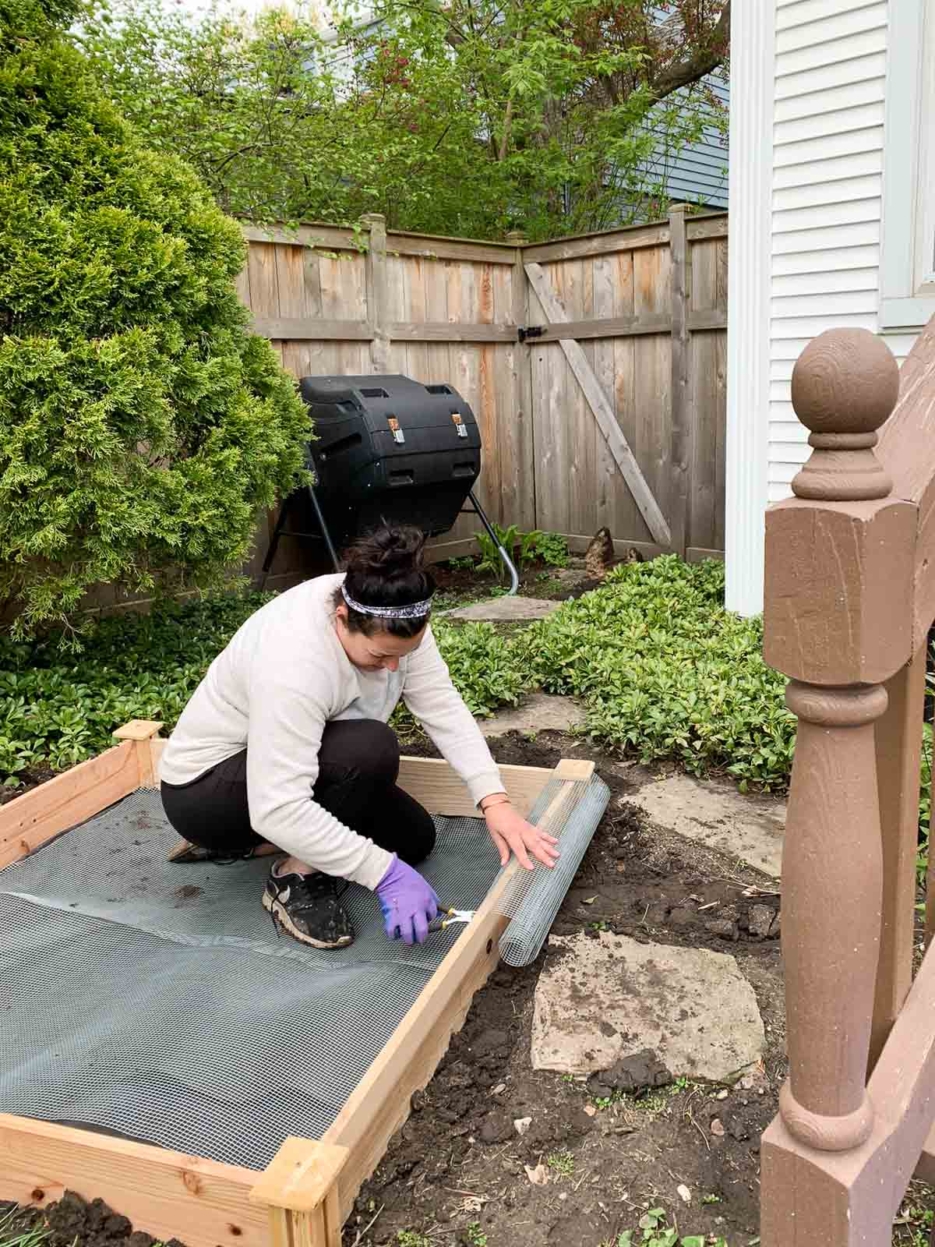
- Cut out (WEAR GLOVES) and lay down the hardware cloth. This is to protect against pests under ground.
- Mix your soil and compost. I used an 80/20 mixture. 80% soil to 20% compost.
- Sprinkle in your vegetable fertilizer
- Rake it all so it mixes in
- PLAN where your seeds/veggies will go
- Tall growing vegetables at the back
- At least 6-12 inches between planted seeds
- Plant seeds about 4inches deep.

Now, creating the DIY Vegetable garden was the easy part. Over the next couple weeks I am going to be using RISE’s AND APPROACH to maintain and have my garden flourish.
It Involves 3 Steps:
- Find
- Solve
- Prevent
FIND The Problem
For me the biggest problem will be pests and animals such as all the rabbits that love my yard already
SOLVE
I will use a combination of solutions to help my garden grow. Come back for part three to see what I am using and if it is working.
PREVENT
I have a couple items that I will be using to prevent the pests from disturbing my garden all summer that will also be in the part three blog post next week.
So, PIN this post for later and don’t forget to come back and read about my pests solutions to keep my DIY Vegetable garden surviving all summer long.
Jennifer says
We want to try our hand at some raised beds this year, hopefully it’s not too late! Thank you for sharing how you did this! I hope you have a great harvest!
Cecilia Cannon says
Thank you so much Jennifer!
Jennie says
Thanks for the tips! We have 2 raised vegetable gardens, but I didn’t know about the garden hardware. Look forward to hearing your tips for maintaining throughout the season!
Cecilia Cannon says
Awesome Jennie! Glad it helps and yes, more to tips to come.
Ashley says
My son has been begging me to do this! I took notes!! Thank you so much girl! I love this!! I need to get my butt in gear to do it!!
Cecilia Cannon says
OH I LOVE IT!! Love that you took notes too. thank you
Laurel and Iron says
I love this! I can’t wait to see how your garden goes this summer
Lauren | https://www.laurelandiron.com/